Datamap Edit Layout
Datamap -- Edit Layout
Overview
In DataMap systems, the Edit Layout interface provides a structured and highly customizable environment for managing dataset metadata. It organizes metadata into logical groups such as System Details, Privacy, Security, Retention, and more. Each group is displayed in a collapsible format, allowing users to expand or collapse sections using dropdown arrows. This makes it easy to navigate and prioritize Metadata categories based on organizational needs. Users can also create new groups or reorder existing ones to reflect evolving data governance structures.
When a group—such as System Details or Dataset Properties—is expanded, it reveals a detailed table of metadata columns associated with that group. Each column can be configured individually, with options to set its display-name, visibility, searchability, and whether it supports custom or predefined values. Users can also adjust the column order using rank controls, assign it to a different group, or mark it for deletion. This granular level of control ensures that metadata remains relevant, searchable, and aligned with internal policies and compliance requirements.
By enabling column-level configuration through the Edit Layout, DataMap systems empower organizations to tailor their metadata framework to suit specific operational, privacy, and regulatory needs. This interface transforms metadata management into a dynamic, user-driven process that supports scalable and secure data practices across the enterprise.
1. Logging In
Login to the Data Governance Tool by entering your credentials.
2. Navigating to Datamap Module
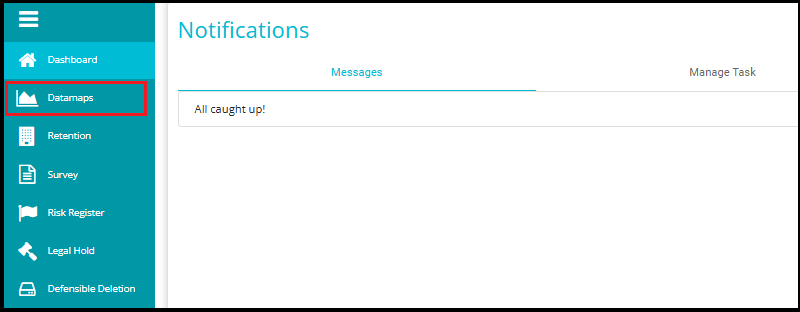
Click on the hamburger icon
 in the top left corner.
 Click on 'Datamap module' from the menu.
3. Click on the Systems Tab
Inside the DataMap module, go to the Systems tab.
This tab displays all the systems available in your environment.
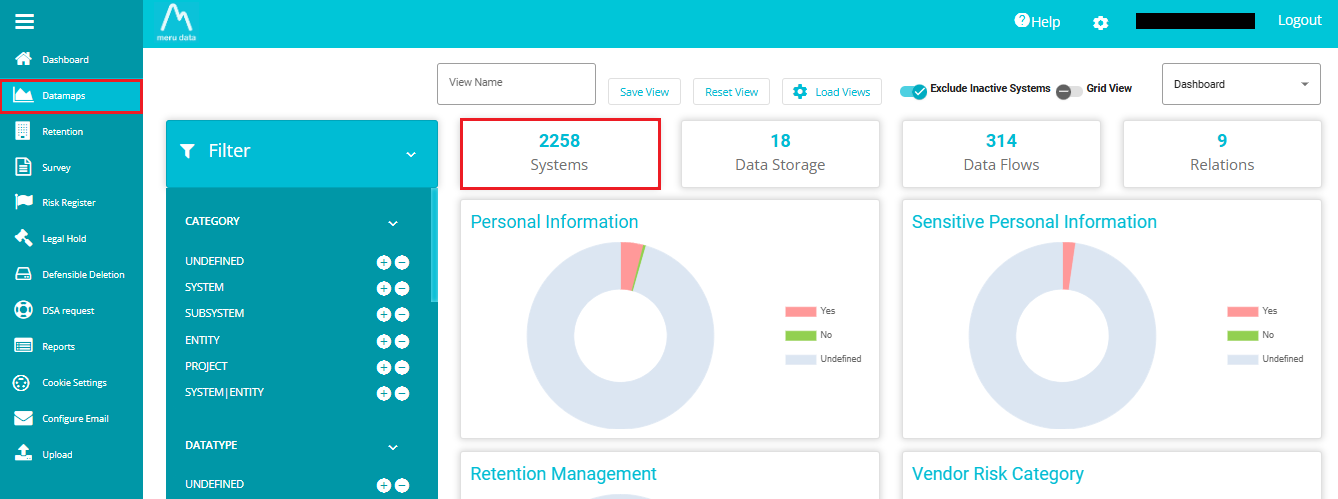
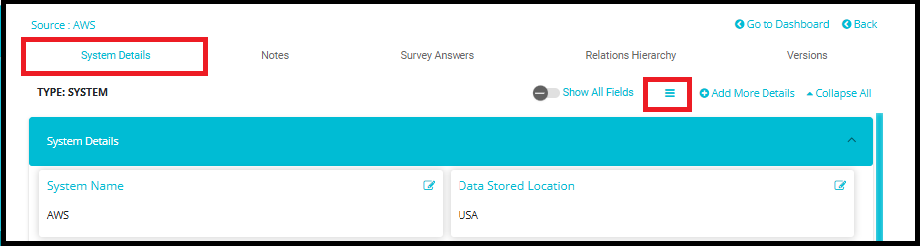
4. To navigate to the system details page, simply click on the desired datamap system name from the displayed list of systems.

- To edit the details of the selected system, click on the "Edit Layout" icon.
5. Navigating to Metadata Columns
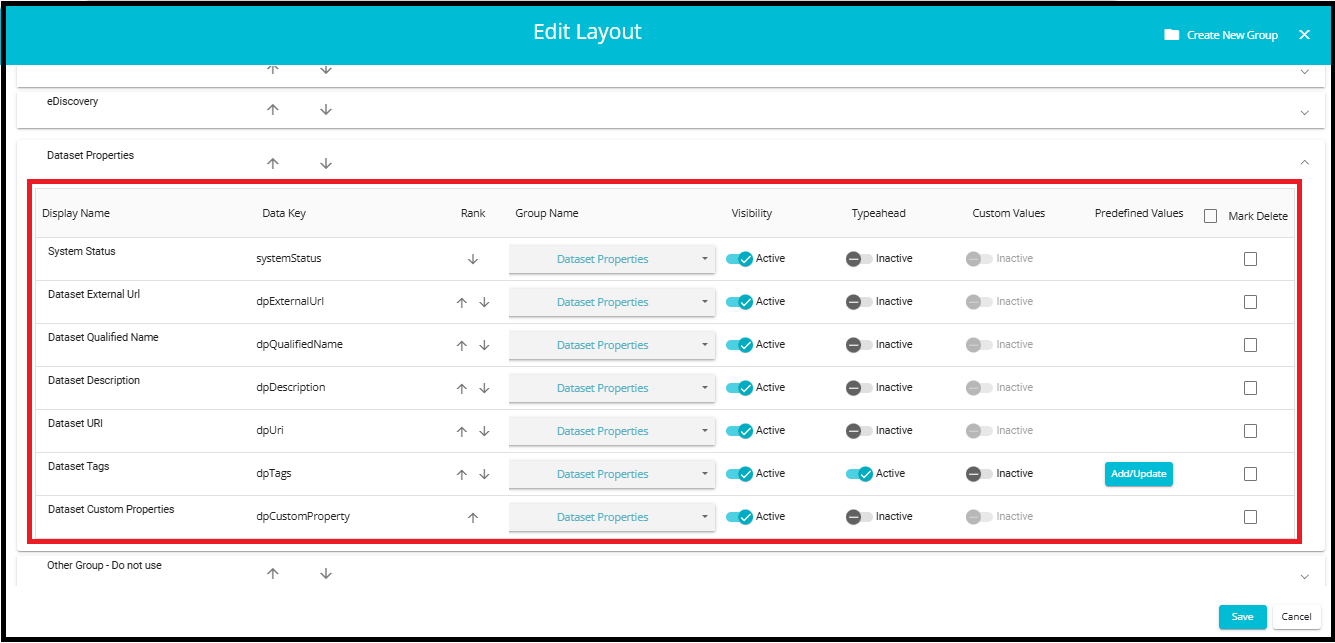
In the "Edit Layout" page, you can manage metadata columns across various categories such as System Details, Privacy, Security, Retention, Backup, eDiscovery, and more.
To view all fields of the selected system (e.g., AWS), click the dropdown arrow at the right-hand corner of each category or simply click anywhere on the category itself after the arrows.

Click the Create New Group button to add and configure a new System Group.
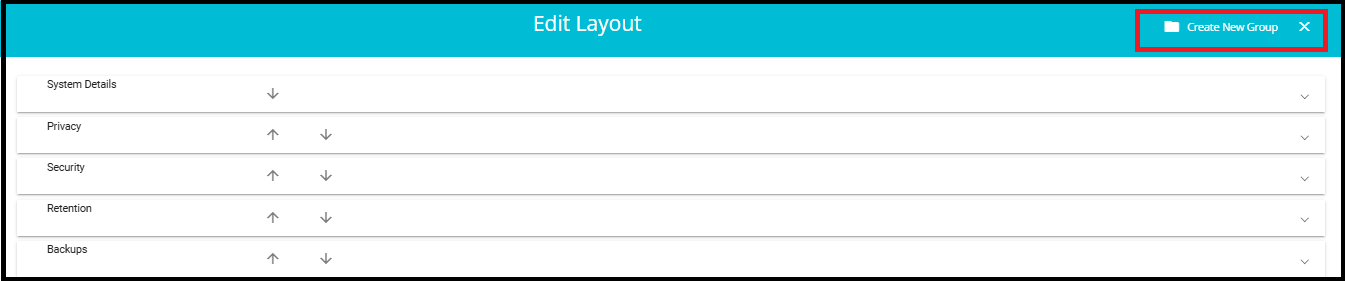
Here you can define the name of the new group.

- Click the arrow of any category to set the order of the categories. Clicking on the top pointing arrow will move that category one place higher. Similarly, clicking the arrow pointing down will move that category one place lower.
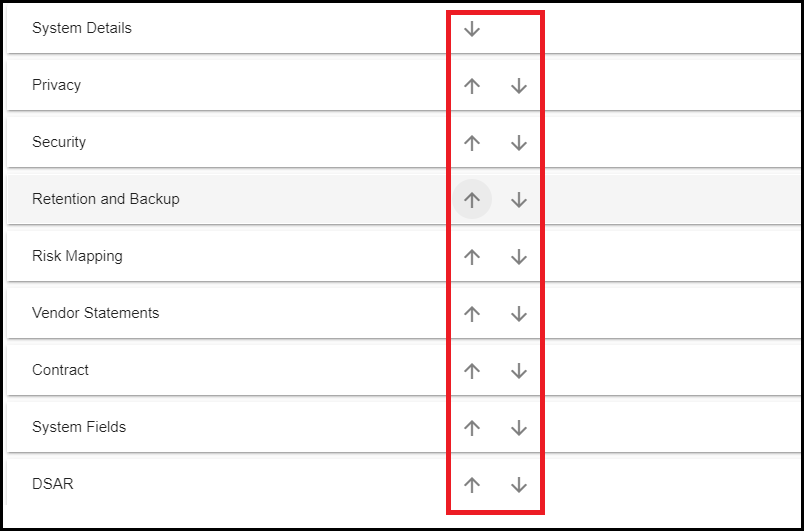
- Click on any of the categories to configure the fields under that category.
Note: Metadata column changes in the Edit Layout are reflected globally across all systems within DataMap, not just the one currently being viewed.
Display Name: Enter the title of the field here. In the below example, System Status is the Display Name for that field.

Data Key: This is the backend key used to identify the system field.
Rank: Click the top arrow to move the field one place higher and the arrow pointing down to move the field one place lower.

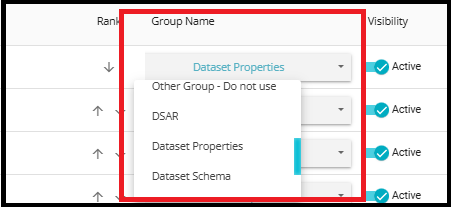
Group Name: From the drop-down menu, select the Category to which the field should be placed under.
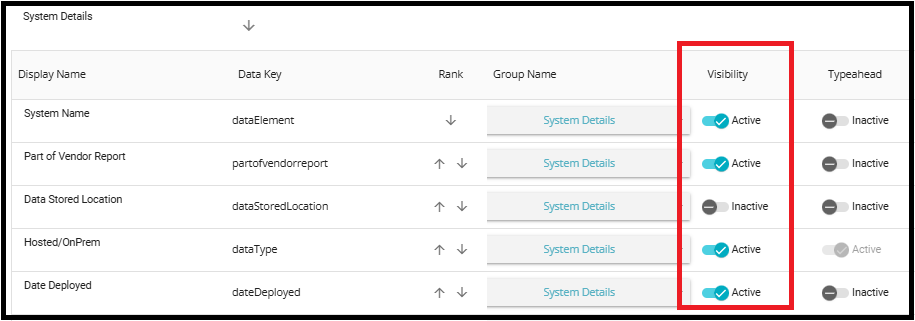
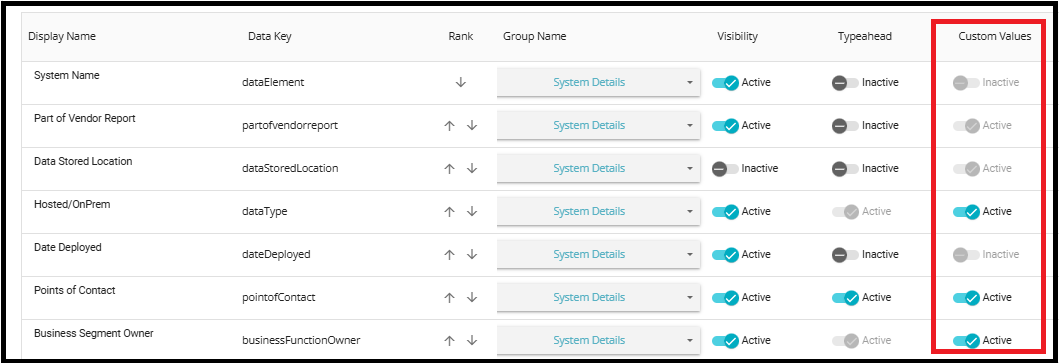
Visibility: Fields can be hidden from the System Details page if needed by making the field Inactive here.
In the example below, the 'Data Stored Location' field is inactive, so it will not appear on the System Details page.
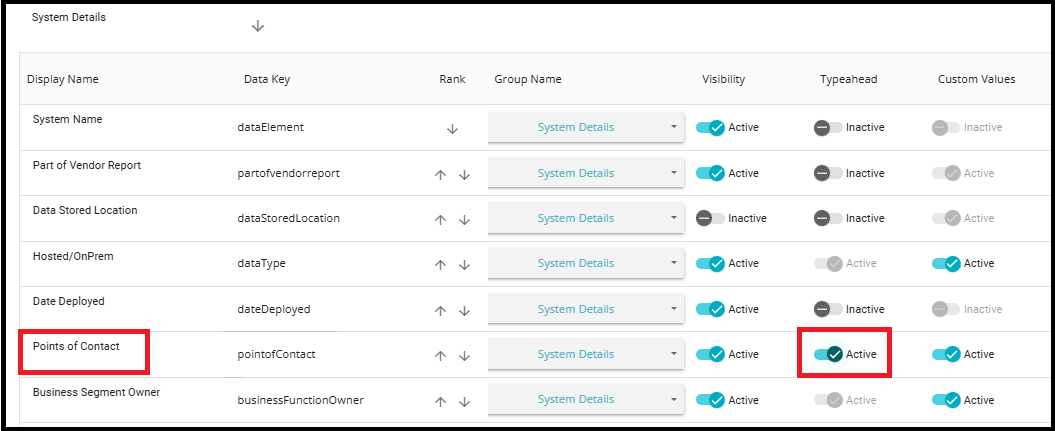
Typeahead: When the Typeahead feature is activated for a metadata field, it transforms the standard text input into a chip-style format. This allows users to enter multiple discrete values, each represented visually as a chip. Unlike traditional dropdowns or suggestion lists, Typeahead in this context does not provide a predefined list of suggestions or autocomplete options. Instead, it simply enables users to input multiple values in a structured, tag-like format. When Typeahead is inactive, the field remains a standard single-line text entry.
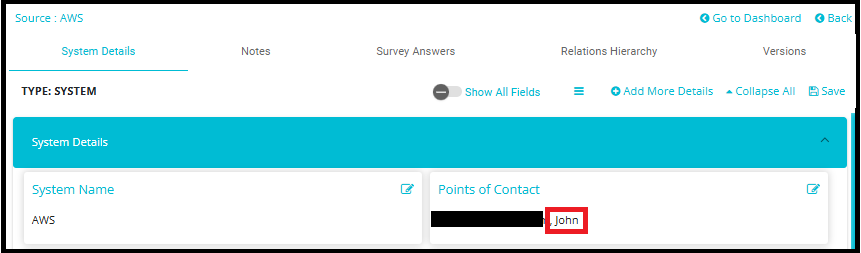
Example: When the Typeahead feature is inactive, fields like "Points of Contact" display values (e.g., "John") as plain text.
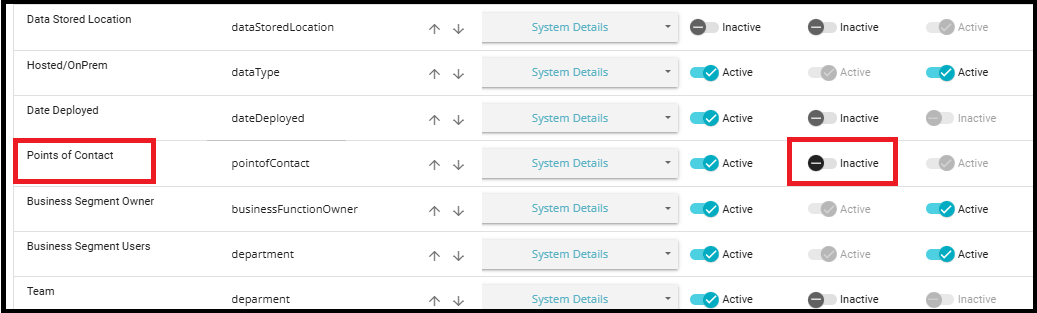
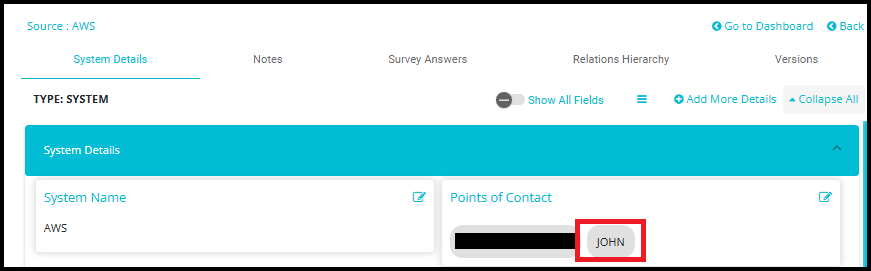
However, once Typeahead is activated, the same field transforms the input into chip format—each value becomes a distinct, pill-shaped chip.
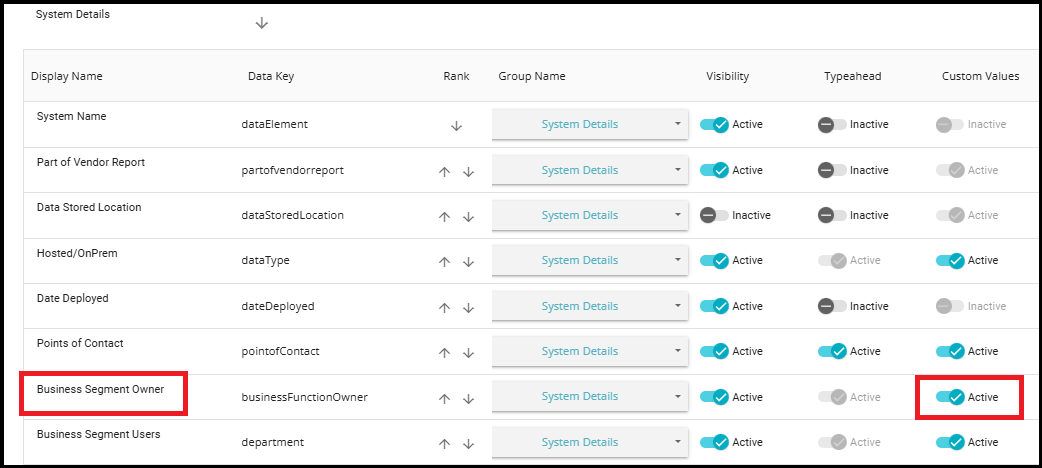
Custom Value: This feature allows users to go beyond selecting from predefined values in a dropdown. When Custom Value is inactive, users can only choose from a fixed list of predefined options. However, when Custom Value is activated, users gain the flexibility to enter new values that are not part of the existing dropdown list. Once a new value is typed in and the updates are saved, that value is automatically added to the dropdown list for future use. This ensures that the system evolves with user input, supporting dynamic and context-specific metadata entries. It’s especially useful in scenarios where the list of valid values is not static and may grow over time based on usage.


Note: Custom Value can be activated only once Typeahead has been activated.
Predefined Value: Once the Typeahead has been activated, the option to Add or Update the values in the drop-down menu will appear here.

Add/update Button
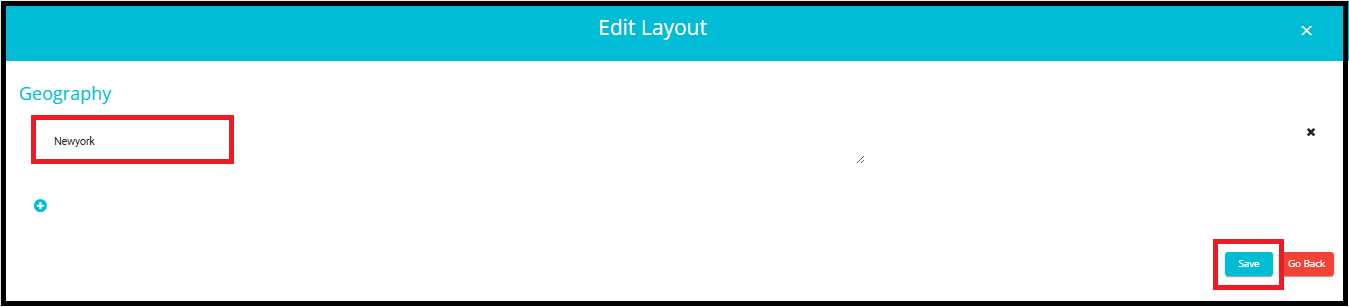
- On clicking the Add/Update button, the Predefined Values page will open. Here, you can add or update values in the drop-down menu.
- To add more values, click the '+' symbol.

Example: In the Geography section, we are adding 'Newyork' using the Add/Update button. After typing in the value and clicking Save,'Newyork' will be added to the drop-down menu.
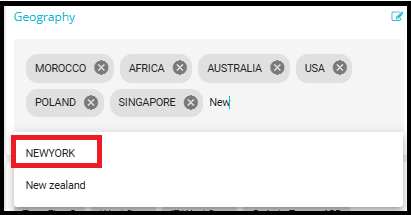
- Initially, there was no value called 'Newyork' in the geography drop-down menu.

- After adding 'Newyork' using the Add/Update button, it now appears as an option in the geography drop-down menu.
Deleting Metadata Columns
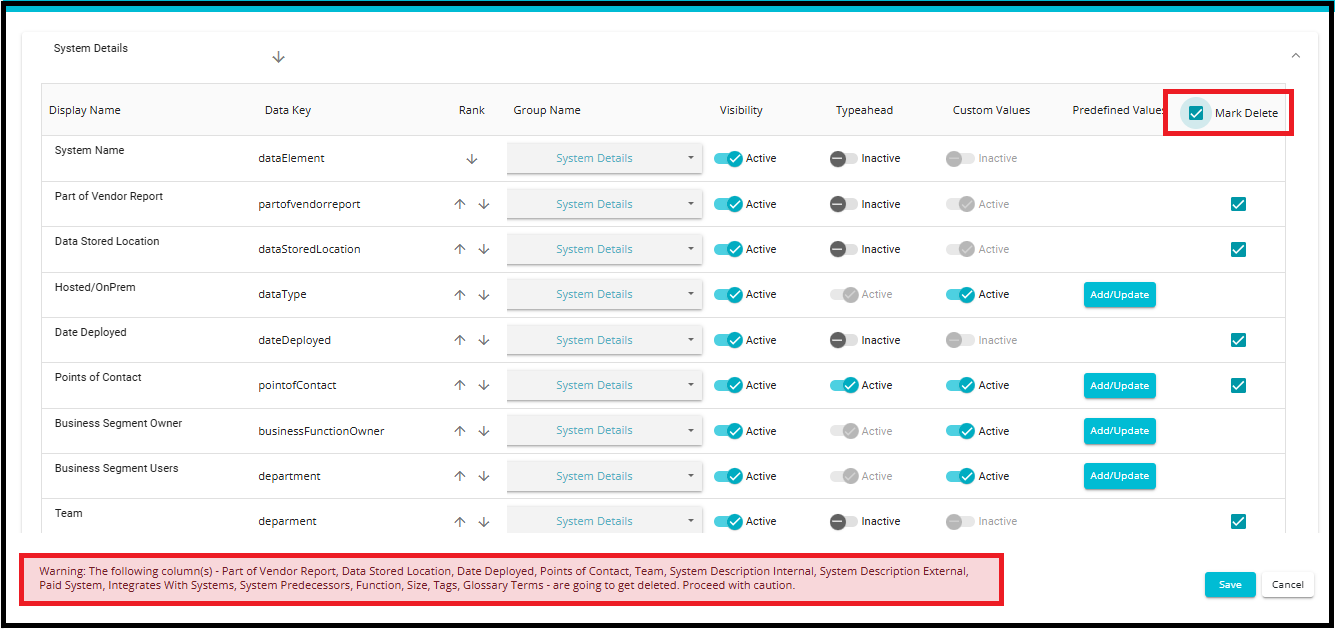
To delete metadata columns, check the box in the "Mark Delete" column next to each non-mandatory metadata entry.
Mandatory columns will not have a checkbox and cannot be deleted.
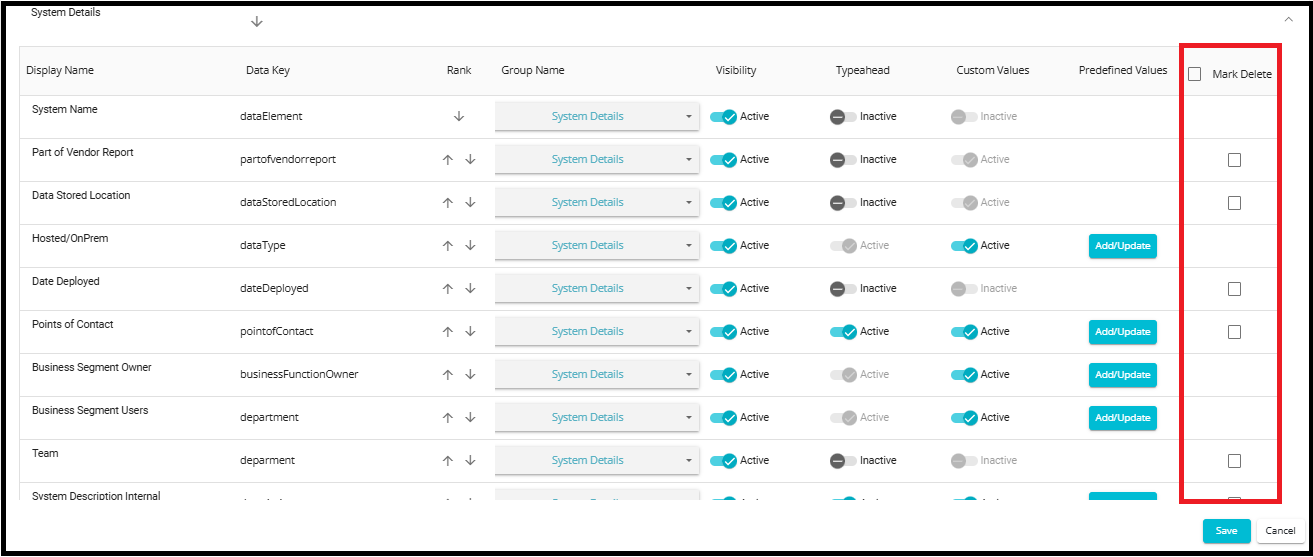
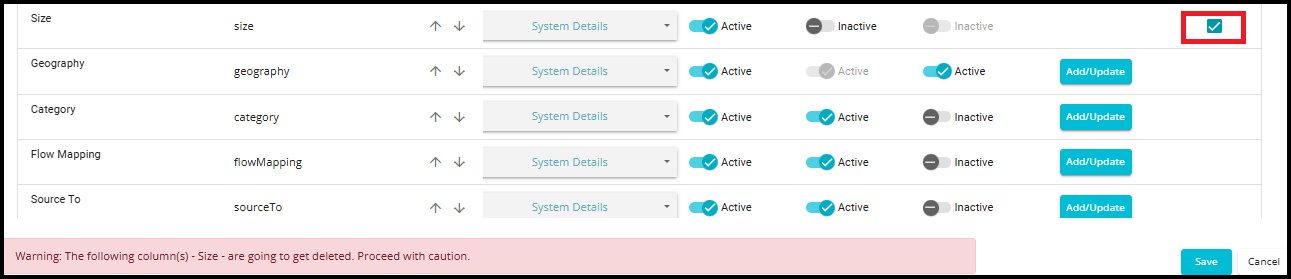
To delete all metadata columns for the selected system, click the checkbox next to "Mark Delete" at the top of the column.
A warning message will appear at the bottom of the page, listing all the columns that are about to be deleted (e.g., Function, Data Stored Location, Points of Contact, etc.).
This message ensures that you are aware of the data being removed before proceeding.
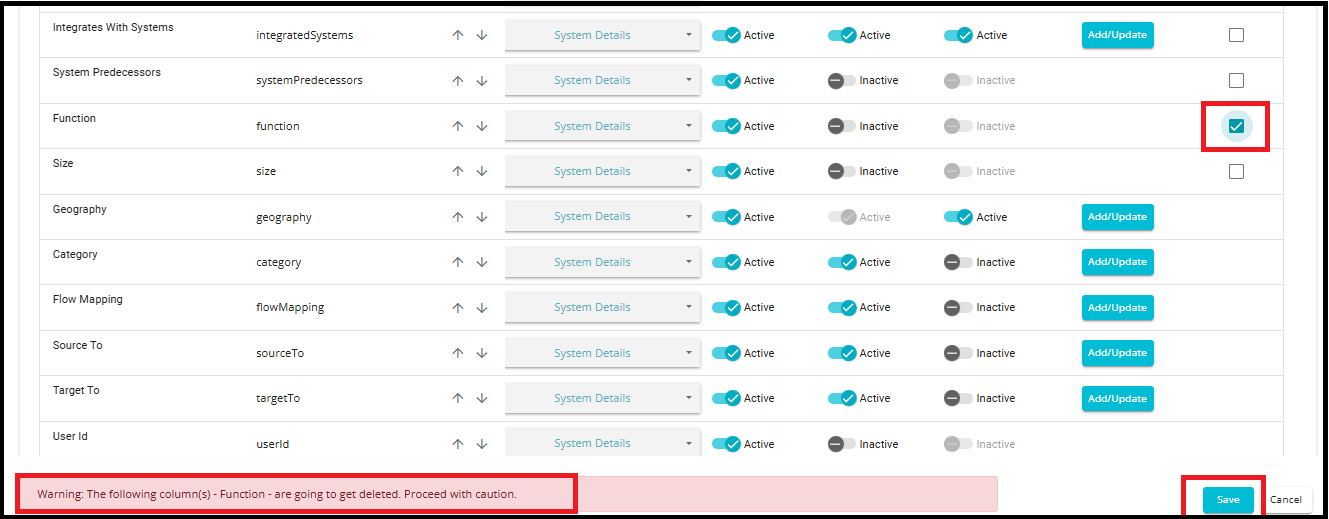
7. Saving and Confirming Metadata Column Deletions
On clicking the "Save" button, the selected columns along with their associated data will be permanently removed.
An info message appears beside the Save button, indicating which columns are marked for deletion.
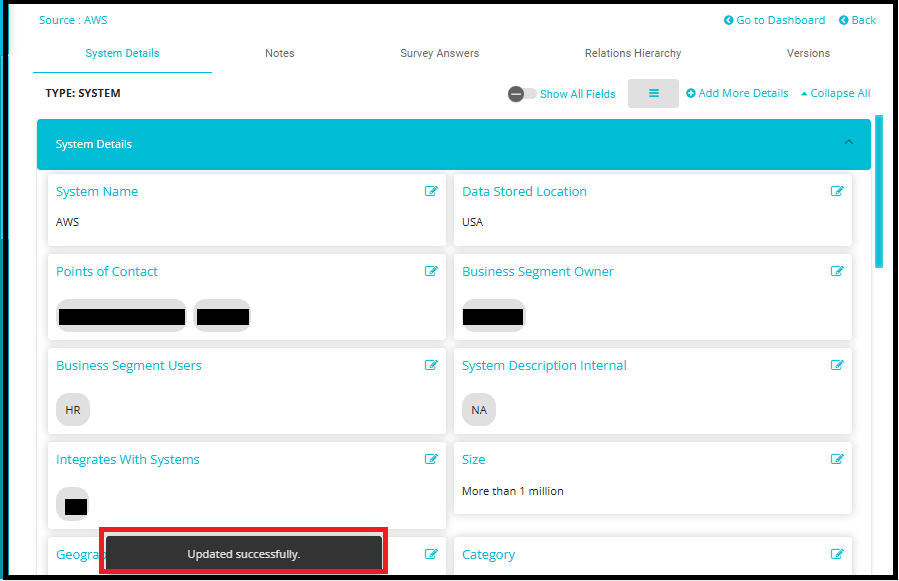
- After successful deletion, you will be navigated back to the System Details page, where a confirmation message "Updated successfully" will appear, indicating that the selected metadata columns have been deleted.
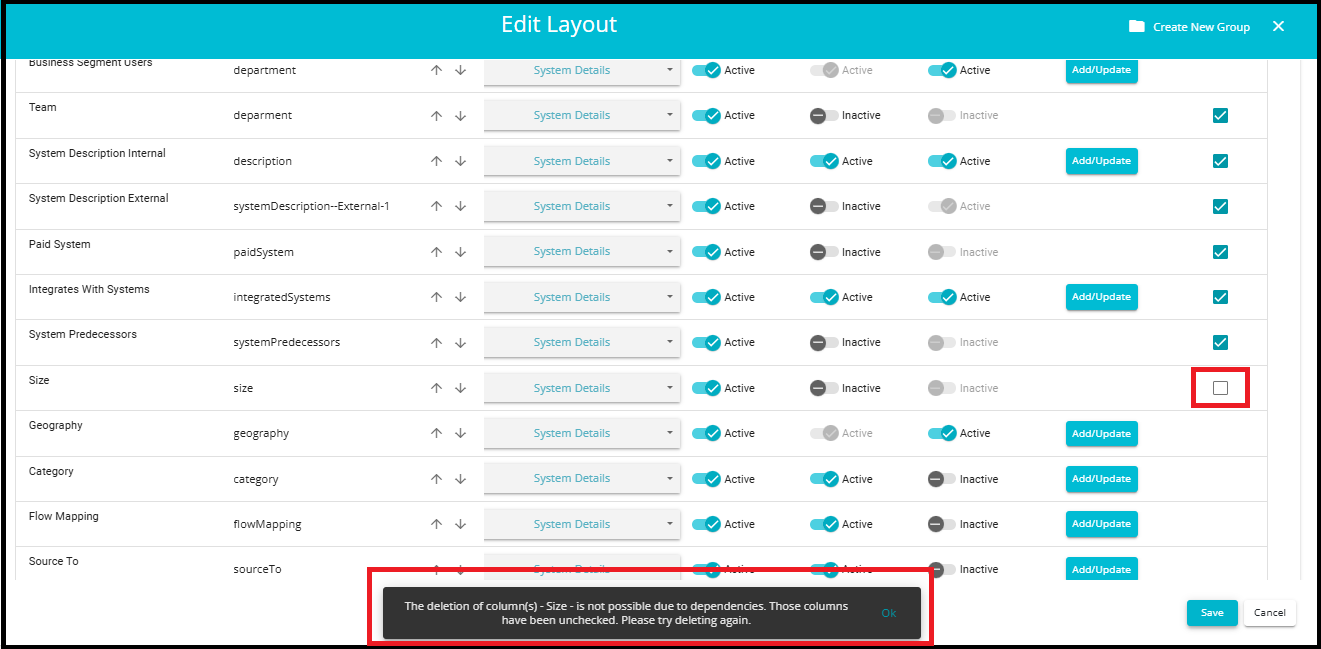
Note: In DataMap systems, certain metadata columns may be linked to other modules—such as Surveys, Reports, Risk Mapping, or DSAR workflows—making them non-deletable directly from the Edit Layout interface.
For example, a column like "Size" might be referenced in a survey question or used in a report filter. If such dependencies exist, the system will automatically uncheck these columns during deletion attempts to prevent breaking cross-module references.